


Setting up Apache Atlas is essential for effective data governance and management. This guide provides a step-by-step process to install Atlas, ensuring optimal performance.
Watch Context Studio Demo
You will learn about the architecture, prerequisites, and how to run Docker Compose.
Follow these instructions to load metadata and navigate the user interface effectively.
Guide to Installing Apache Atlas
Permalink to “Guide to Installing Apache Atlas”In this guide, we’ll look into the step-by-step process of setting up Apache Atlas understand the architectural components and how they communicate with each other, and learn about some of the data governance features that Apache Atlas offers.
For ease of understanding, the setup process has been sequentially divided into the following steps:
- Going through the prerequisites for installing Atlas
- An overview of Apache Atlas architecture
- Cloning the Docker Atlas repository
- Running Docker Compose to install Atlas and related components
- Loading Metadata into Atlas
- Navigating the UI and exploring data governance features
Is Open Source really free? Estimate the cost of deploying an open-source data catalog 👉 Download Free Calculator
Prerequisites for Installing Apache Atlas
Permalink to “Prerequisites for Installing Apache Atlas”- A local instance or a cloud VM (for instance, on AWS, Google Cloud, or Azure) running Docker and Docker Compose.
- GitHub Repositories —Docker Atlas and MediaWiki schema for Hive.
- Docker Images —Apache Atlas (based on ING Bank’s Atlas repo), Zookeeper, Kafka, Hadoop namenode, Hadoop datanode, and Hive PostgreSQL metastore, Hive server (based on Big Data Europe’s repos).
- Maven will be used to build Atlas as part of Docker Compose. The installation sequence will present itself in the screenshots in the guide.
Pro tip: Compared to the official guide on the Atlas website, you may find this GitHub repository by Lucas Miguel Ponce providing a better experience of setting up Atlas.
Set up Apache Atlas
Permalink to “Set up Apache Atlas”Apache Atlas Architecture
Permalink to “Apache Atlas Architecture”- Atlas Core—Similar to other metadata search and discovery engines, Atlas uses graph databases, a full-text search engine, and a metadata store to enable various search operations. Atlas uses JanusGraph as the graph database, Solr as the full-text search engine, and HBase as the metadata store.
- Metadata Sources—Atlas currently supports six different hook-based input sources to get your metadata into the system — HBase, Hive, Sqoop, Storm, Kafka, and Falcon. You can integrate either of these metadata sources into an upstream data source like a relational database, or a data warehouse, and so on.
- Integration Layer—Atlas enables the communication between the metadata sources, the application, and the Atlas core layers in two ways — REST APIs and Kafka. This guide will use the Atlas Hive hook for CRUD operations on the metadata in Atlas. These operations are performed using Kafka notifications.
- Application Layer—Like other metadata search and discovery engines, Atlas exposes an admin UI that business users and product owners can use for data governance, classification, metadata search, contextualization, and lineage. Ranger-based policies back data governance features.

Apache Atlas Architecture - Source: Apache Atlas.
Start All Containers
Permalink to “Start All Containers”Go to the root of the cloned repository and use the docker-compose up command to begin the setup:
cd docker-atlas-master
docker-compose up
The setup will start with the following output on the console:
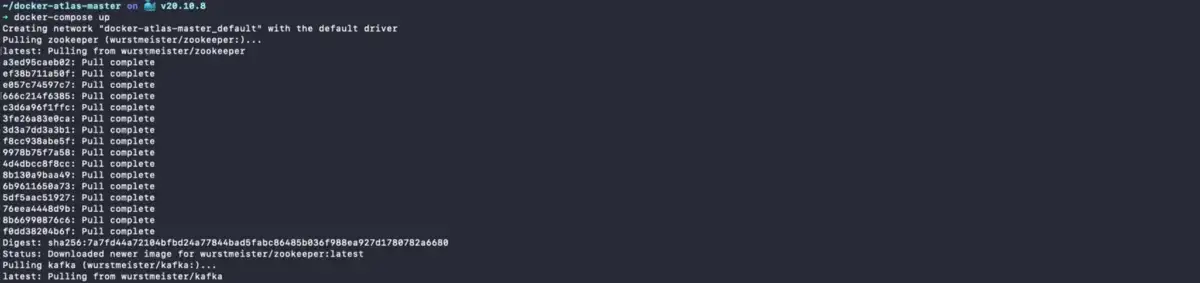
Install Atlas using Docker Compose - Source: Apache Atlas.
After pulling the Docker images for Kafka, Hadoop, and Hive, as mentioned in the prerequisites, the setup will proceed with Docker Compose triggering a Maven build of Atlas as shown in the image below:
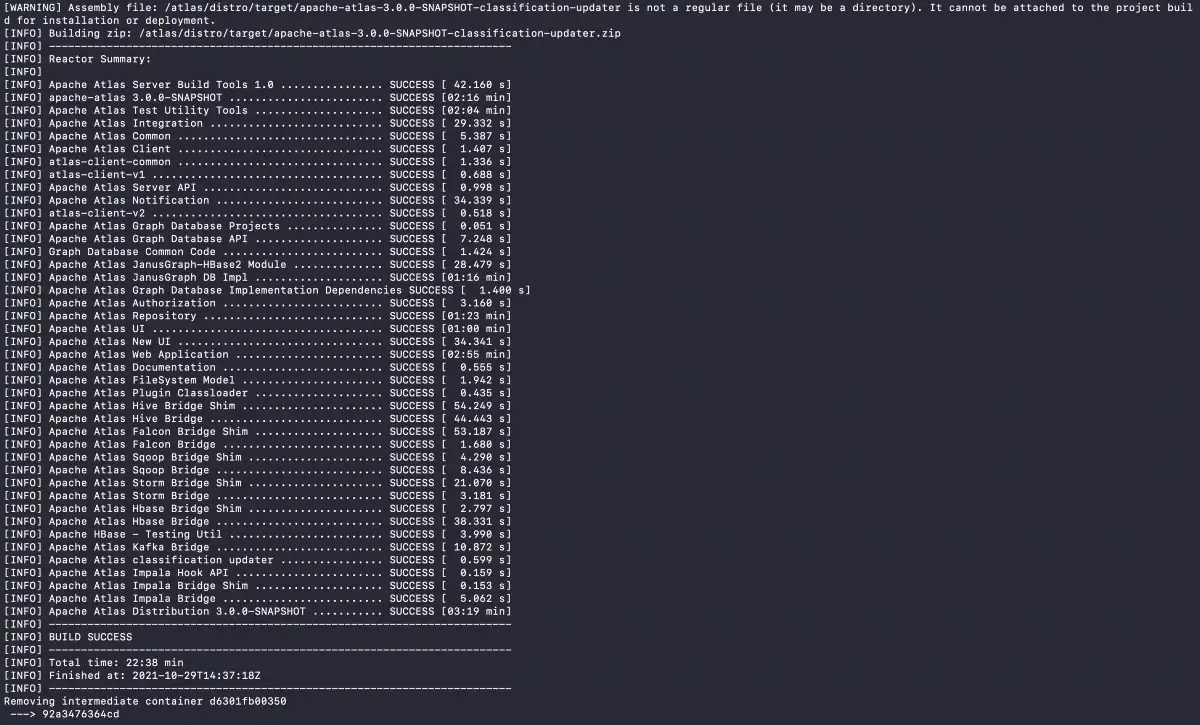
Maven Build Components for Atlas - Source: Apache Atlas.
When the build is completed, the following eight containers will be created, the status of which you can check using the docker ps command in a separate console tab:
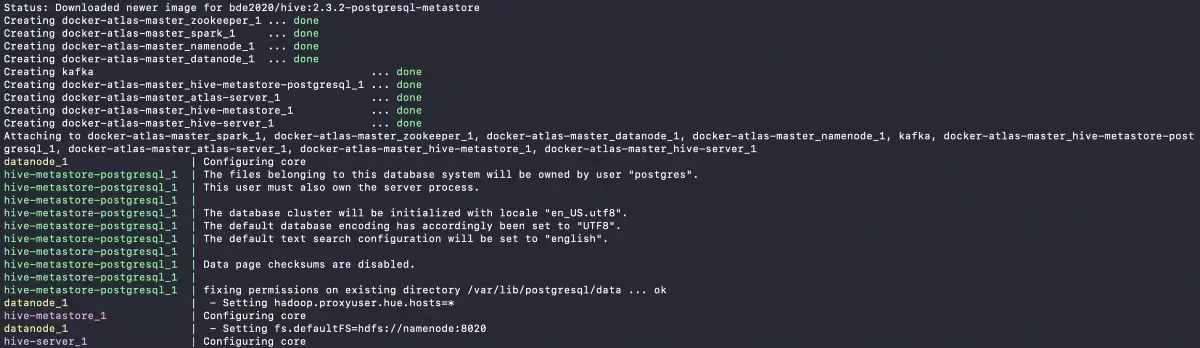
Docker Atlas Containers - Source: Apache Atlas.
Note: This guide doesn’t use Spark. The spawning of these containers does take quite a bit of time. It might test your patience. You’ll be able to track the setup activity in a fairly detailed manner on the console, as shown in the image below:
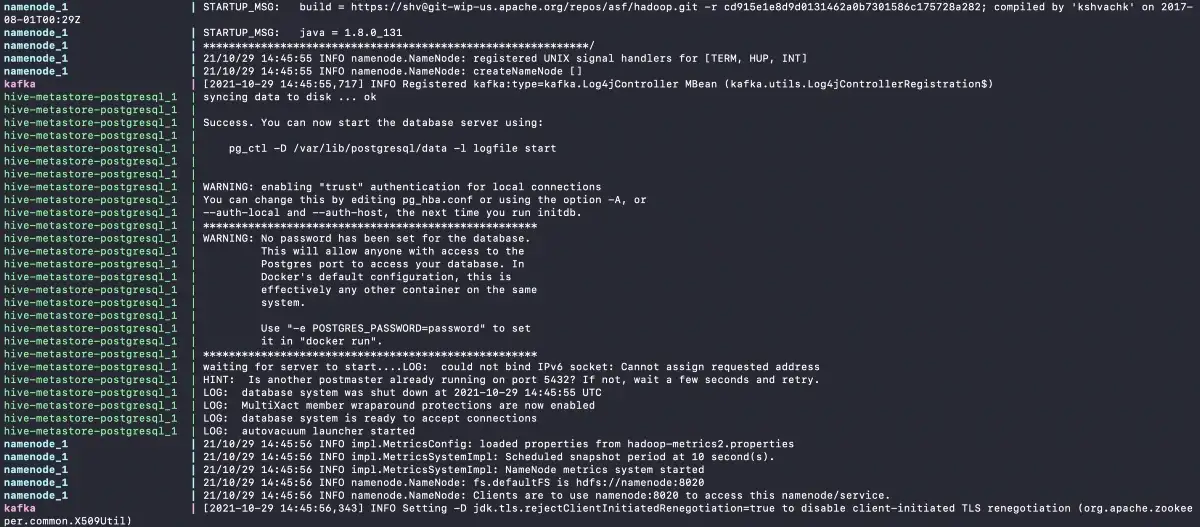
Docker Compose Installation Progress - Source: Apache Atlas.
The final step in the installation is the starting of the Apache Atlas Server. Once you see the following screen:
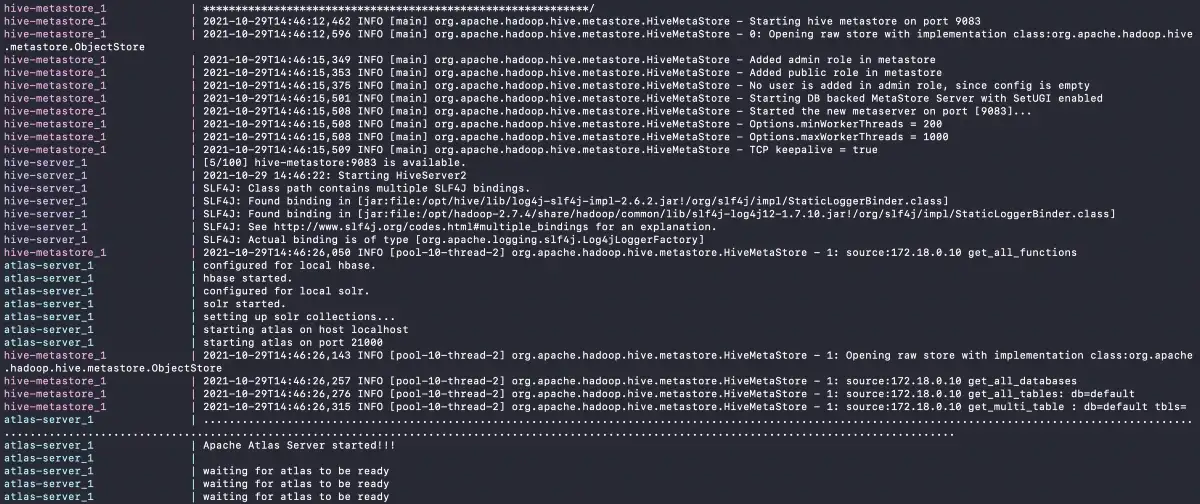
Apache Atlas Server Started - Source: Apache Atlas.
Atlas might only take a minute or two to get ready. You can check the status by either visiting https://localhost:21000 or running the following command:
curl -u admin:admin http://localhost:21000/api/atlas/admin/version
If all’s well, you’ll get a response like the following:
{
  "Description": "Metadata Management and Data Governance Platform over Hadoop",
  "Revision": "21b15842fd74bc91910b2d8901dbea57769065d0",
  "Version": "3.0.0-SNAPSHOT",
  "Name": "apache-atlas"
}
After verifying the status of Atlas and before logging into the Atlas admin UI, you can also check the status of all the containers using the docker ps command:
{% raw %}docker ps --format
  '{"ID": "{{ .ID }}",
    "Image": "{{ .Image }}",
    "Names": "{{ .Names }}"}' | jq -C --indent 4{% endraw %}
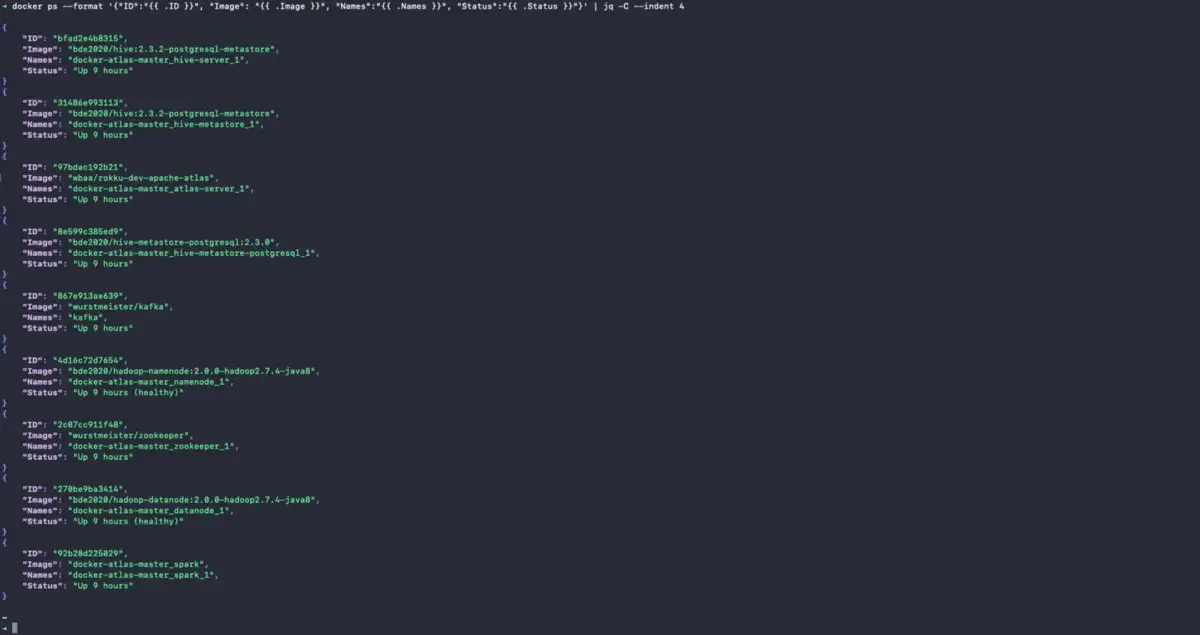
Check Installation Status using docker ps - Source: Apache Atlas.
Load Metadata into Apache Atlas
Permalink to “Load Metadata into Apache Atlas”This guide will use a simplified version of the MediaWiki schema. To ingest the metadata for this schema into Atlas, log into the Hive server container and enter the Hive server using the beeline CLI as shown below:
docker-compose exec hive-server bash
Please note that there’s an example of a table called mediawiki.archive which is created using the beeline CLI. You’ll see the following screen after logging in:
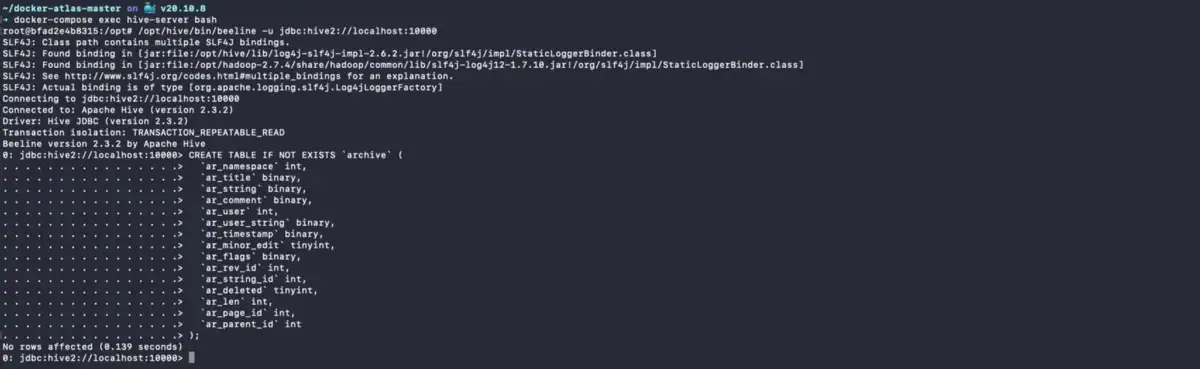
Log into Hive Server and Beehive Console - Source: Apache Atlas.
Note: Use
admin/adminas username/password for logging into Apache Atlas UI.
What happens when you create a table in the Hive console? An event is published to the Kafka topic, which, in turn, is consumed by JanusGraph, HBase metadata store, and Solr. Give it a couple of seconds, and you’ll be able to see it in the Atlas UI.

Apache Atlas Login Screen - Source: Apache Atlas.
When you create the schema in Hive, you’ll see the following output in the setup console. For debugging purposes, you will be able to see any SQL errors both in the Hive console and the Docker Compose console where you initially started Atlas setup, as shown in the image below:
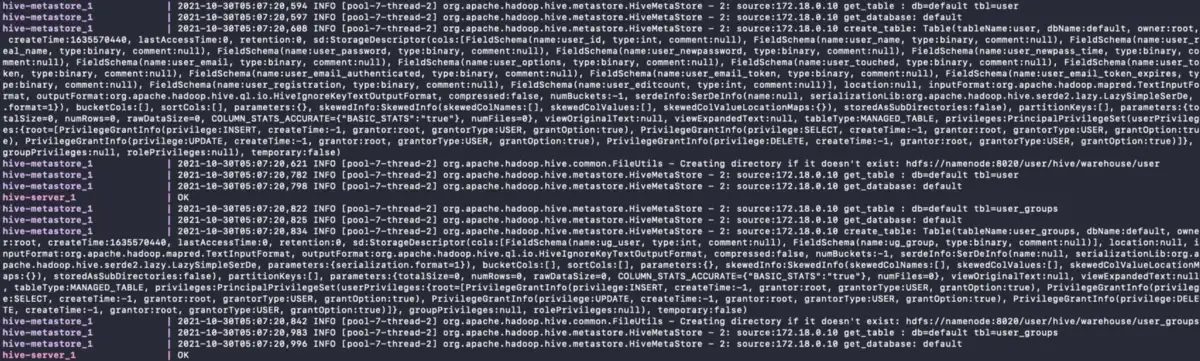
Bulk Ingest Metadata into Hive - Source: Apache Atlas.
Now that you’ve ingested some metadata into Atlas let’s see how to navigate it using the Admin UI.
Navigate the UI
Permalink to “Navigate the UI”Before we move ahead, let’s quickly look at what the Admin UI provides you. Atlas allows you to search through Entities, Classifications, and Glossaries.

Apache Atlas User Interface - Source: Apache Atlas.
- Entities — are objects fetched either from the hook or the REST API from a metadata source. Entities can be database tables, schemas, views, object storage directories, and so on.
- Classifications — enable you to implement effective data governance by classifying the data stored in different data objects. One common use case is to tag or classify PII data for data security and compliance purposes. You can apply classification to entities.
- Glossaries — are business-specific. Entities and classifications are usually business agnostic and can be used across different businesses. Business-specific vocabularies help the business users and teams contextualize the data. These glossary terms can be mapped entities.
Note: You can also associate glossary terms with classifications. Atlas makes sure when you associate a classification with a glossary term, the classification is automatically propagated to all entities associated with the glossary term.
Add classification
Permalink to “Add classification”In this guide, you’ll see four custom classifications — PII, HIGHLY_SENSITIVE, SENSITIVE, PUBLIC. You can make it more granular based on the use case. Notice how the Propagate option is chosen by default in the image below:
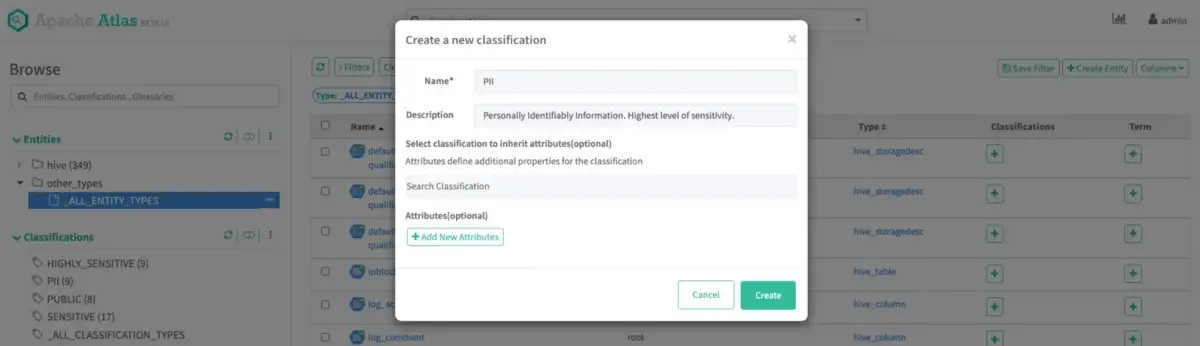
Create a new Classification - Source: Apache Atlas.
Apply Classifications
Permalink to “Apply Classifications”Apply classifications to your entities. As this guide is meant to explore the UI, don’t focus a lot right now on the aptness of the classifications. Notice in the image below that some entities have been assigned to all of the classifications, and a filter has been created and applied, which shows only PII and HIGHLY_SENSITIVE entities.
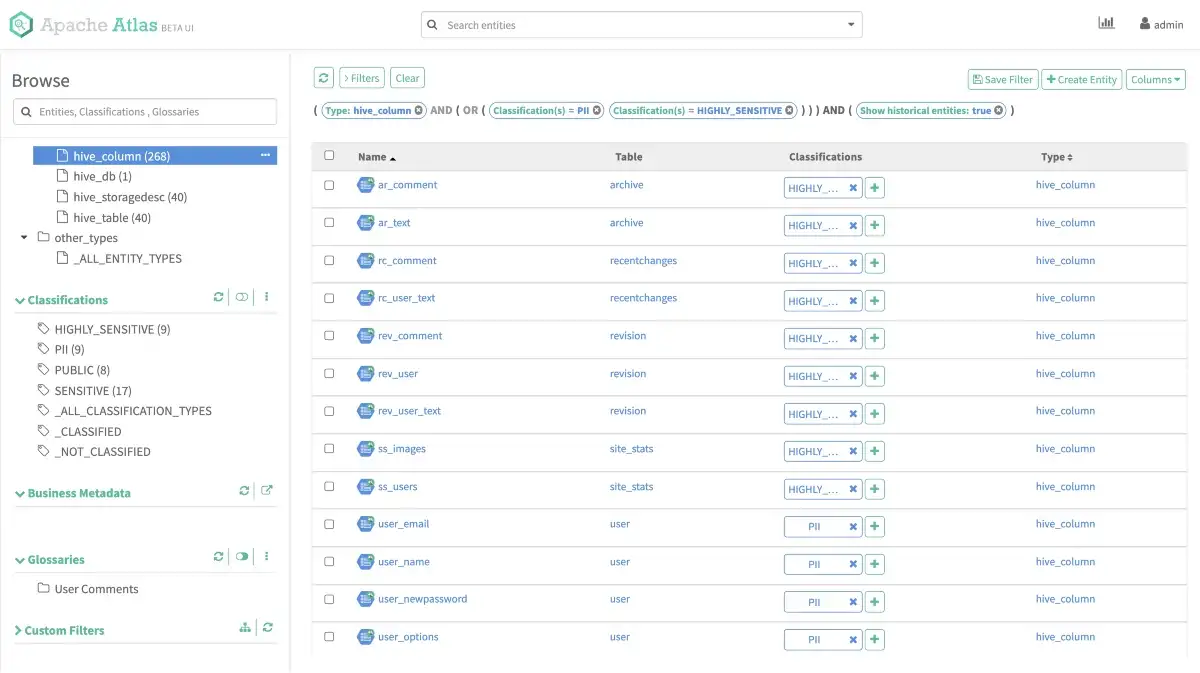
Apply Classifications to Entities - Source: Apache Atlas.
Refer to this document to learn more about classifications, data governance, and data stewardship using Atlas.
Note: A quick reminder that, in this guide, you’ve seen metadata ingested using a Hive schema created directly in Hive. In a production setup, metadata from a database or a data warehouse, etc. should ideally be written to Hive using a job scheduled using Airflow or something similar.
Entity Details
Permalink to “Entity Details”Clicking on any entity will take you to a screen where you’ll be able to see all the entity’s properties, such as comment, description, name, type, and so on. You’ll also be able to see a lineage graph, the relationships of this entity, the classifications applied to it, the user-defined properties, and so on. You’ll see the above-mentioned navigation options for the user_email field of the mediawiki.user table, which is classified as PII in the image below:
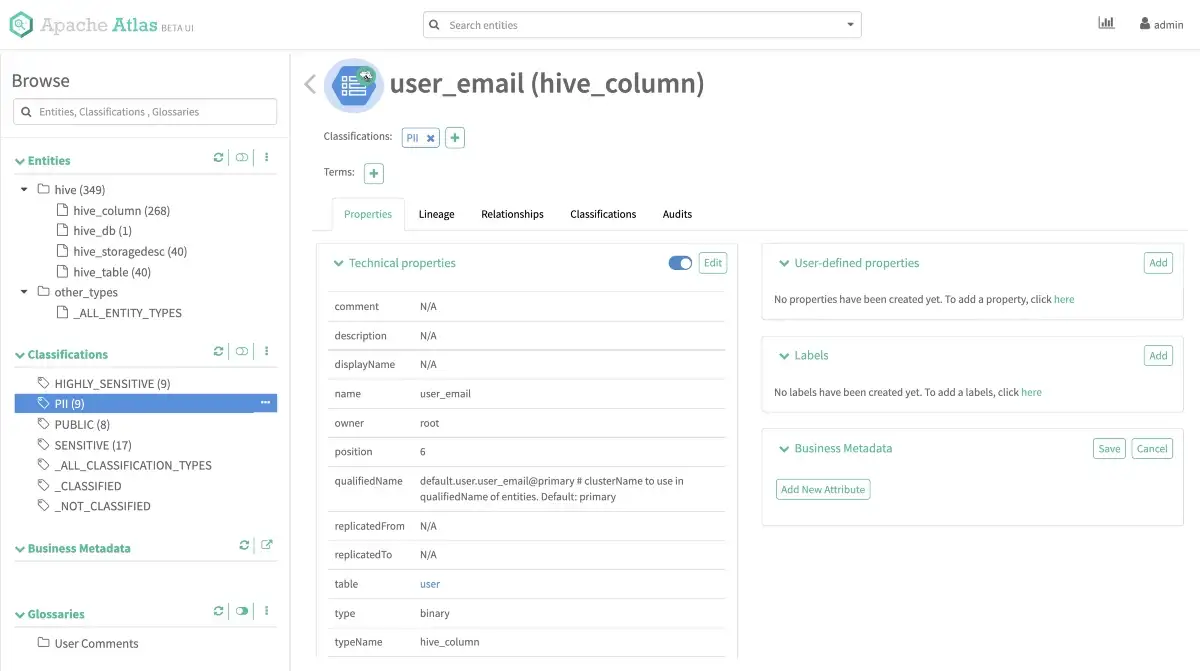
Entity description and details - Source: Apache Atlas.
Now that you have the metadata ingested into Atlas start playing around with the different features. For instance, in the image below, you’re looking at notification details of one of the configured Hooks, i.e., the Atlas Hive Hook, using which you’ve ingested the metadata into Atlas. You can click the chart option on the top-right of the screen and see Atlas statistics. When dealing with many entities being ingested into the system, this can help identify the number of ingestion successes and failures and changes to the metadata.
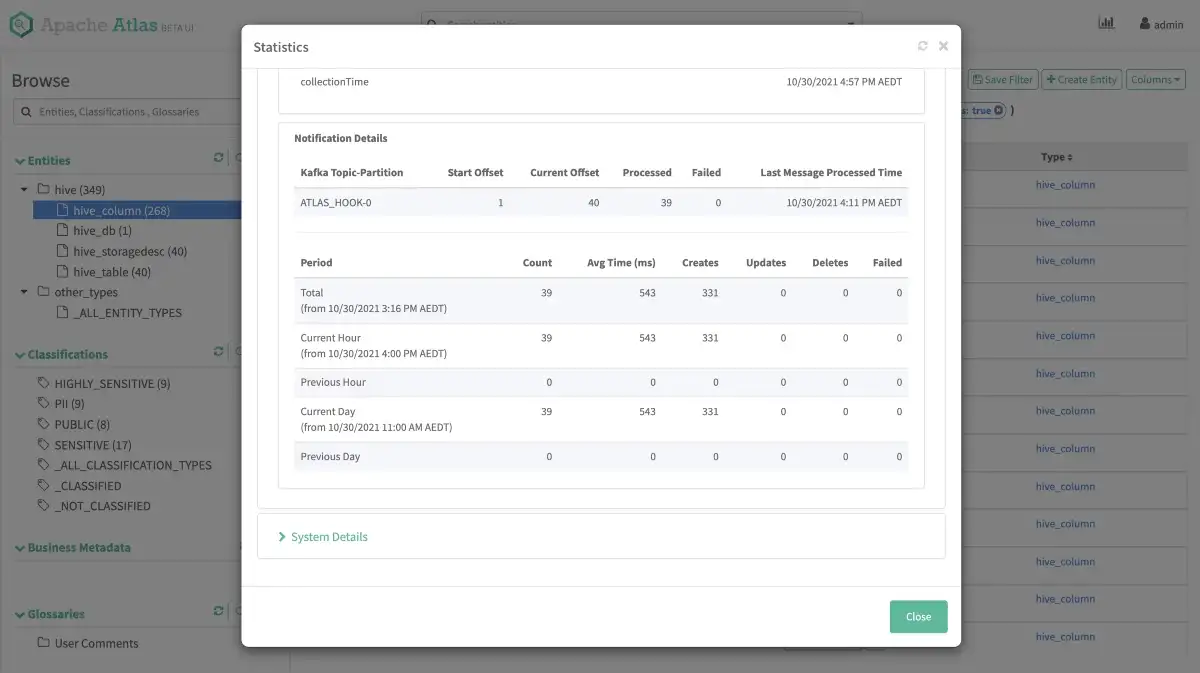
Atlas Statistics - Source: Apache Atlas.
Next Steps
Permalink to “Next Steps”This guide was a 101 course in setting up Atlas. Next up in this series of guides is a deep dive into applying data governance and stewardship using Atlas with a single metadata source. After that, we’ll look into integrating multiple metadata sources and automating the ingestion with a scheduler.
How organizations making the most out of their data using Atlan
Permalink to “How organizations making the most out of their data using Atlan”Atlan is a Leader in the Gartner Magic Quadrant for Metadata Management and the Forrester Wave for Data Catalogs — with the highest Gartner score for data lineage and impact analysis. The Forrester comparison evaluated 24 aspects of cataloging across three criteria:
- Automatic cataloging of the entire technology, data, and AI ecosystem
- Enabling the data ecosystem AI and automation first
- Prioritizing data democratization and self-service
These criteria made Atlan the ideal choice for a major audio content platform, where the data ecosystem was centered around Snowflake. The platform sought a “one-stop shop for governance and discovery,” and Atlan played a crucial role in ensuring their data was “understandable, reliable, high-quality, and discoverable.”
For another organization, Aliaxis, which also uses Snowflake as their core data platform, Atlan served as “a bridge” between various tools and technologies across the data ecosystem. With its organization-wide business glossary, Atlan became the go-to platform for finding, accessing, and using data. It also significantly reduced the time spent by data engineers and analysts on pipeline debugging and troubleshooting.
The same metadata graph also serves AI agents. Atlan’s Context Layer enriches raw metadata with business definitions, quality scores, and semantic relationships — then delivers that context via MCP so agents can query governed data before they act.
Tide’s Story of GDPR Compliance: Embedding Privacy into Automated Processes
Permalink to “Tide’s Story of GDPR Compliance: Embedding Privacy into Automated Processes”- Tide, a UK-based digital bank with nearly 500,000 small business customers, sought to improve their compliance with GDPR’s Right to Erasure, commonly known as the “Right to be forgotten”.
- After adopting Atlan as their metadata platform, Tide’s data and legal teams collaborated to define personally identifiable information in order to propagate those definitions and tags across their data estate.
- Tide used Atlan Playbooks (rule-based bulk automations) to automatically identify, tag, and secure personal data, turning a 50-day manual process into mere hours of work.
For teams that prefer managed deployment, Atlan extends the Atlas metadata graph with 100+ connectors and enterprise-grade governance. See how it works →
FAQs about How to Setup Atlas
Permalink to “FAQs about How to Setup Atlas”1. What is Apache Atlas and how can it be set up for optimal performance?
Permalink to “1. What is Apache Atlas and how can it be set up for optimal performance?”Apache Atlas is an open-source metadata management and data governance platform. To set it up for optimal performance, ensure you have the necessary prerequisites, including Docker and Docker Compose. Follow the step-by-step installation guide to configure Atlas effectively.
2. What specific features of Atlas should I focus on for better search visibility?
Permalink to “2. What specific features of Atlas should I focus on for better search visibility?”Focus on features like metadata classification, lineage tracking, and the admin UI. These features help in organizing data effectively, making it easier for search engines to index and retrieve relevant information.
