

Status, September 2026: Amundsen is archived. The Amundsen repository carries the notice “Due to inactivity, this project was archived in September 2026. The contents will remain available for historical purposes,” and GitHub records the archive on September 10, 2026. The code is still public under Apache-2.0 and the steps below still run against it, so this guide is for someone maintaining an existing Amundsen deployment: no new releases, no security patches, no maintainer review of issues or pull requests. If you are building a catalog from scratch on Google Cloud, start on a maintained project instead, such as DataHub or OpenMetadata.
Coping up with various data sources and structures is often grueling for data engineering teams, finding what’s in the data warehouse or a data lake, and even more so for business and analytics teams. Metadata catalogs and data discovery engines help sort out the problems mentioned above. Amundsen was one such open-source metadata catalog, built at Lyft and archived in September 2026.
Is Open Source really free? Estimate the cost of deploying an open-source data catalog 👉 Download Free Calculator
This step-by-step guide will take you through setting up Amundsen on GCP (Google Cloud) using Docker. You’ll be using Amundsen with its default database backend of neo4j. Alternatively, you can also use Apache Atlas to provide the backend.
Eight steps to setup Amundsen on GCP
- Create a Google Cloud VM
- Configure networking to enable public access to Amundsen
- Log in to the Cloud VM with Cloud Shell and install Git
- Install Docker and Docker Compose on your GCP VM
- Clone the Amundsen GitHub repository
- Deploy Amundsen using Docker Compose on GCP
- Load sample data using Databuilder
Step 1: Create a Google Cloud VM
Start by logging into your Google Cloud account. You’ll be installing Amundsen on a fresh instance, so go ahead and spin up a new VM instance, as shown in the image below:
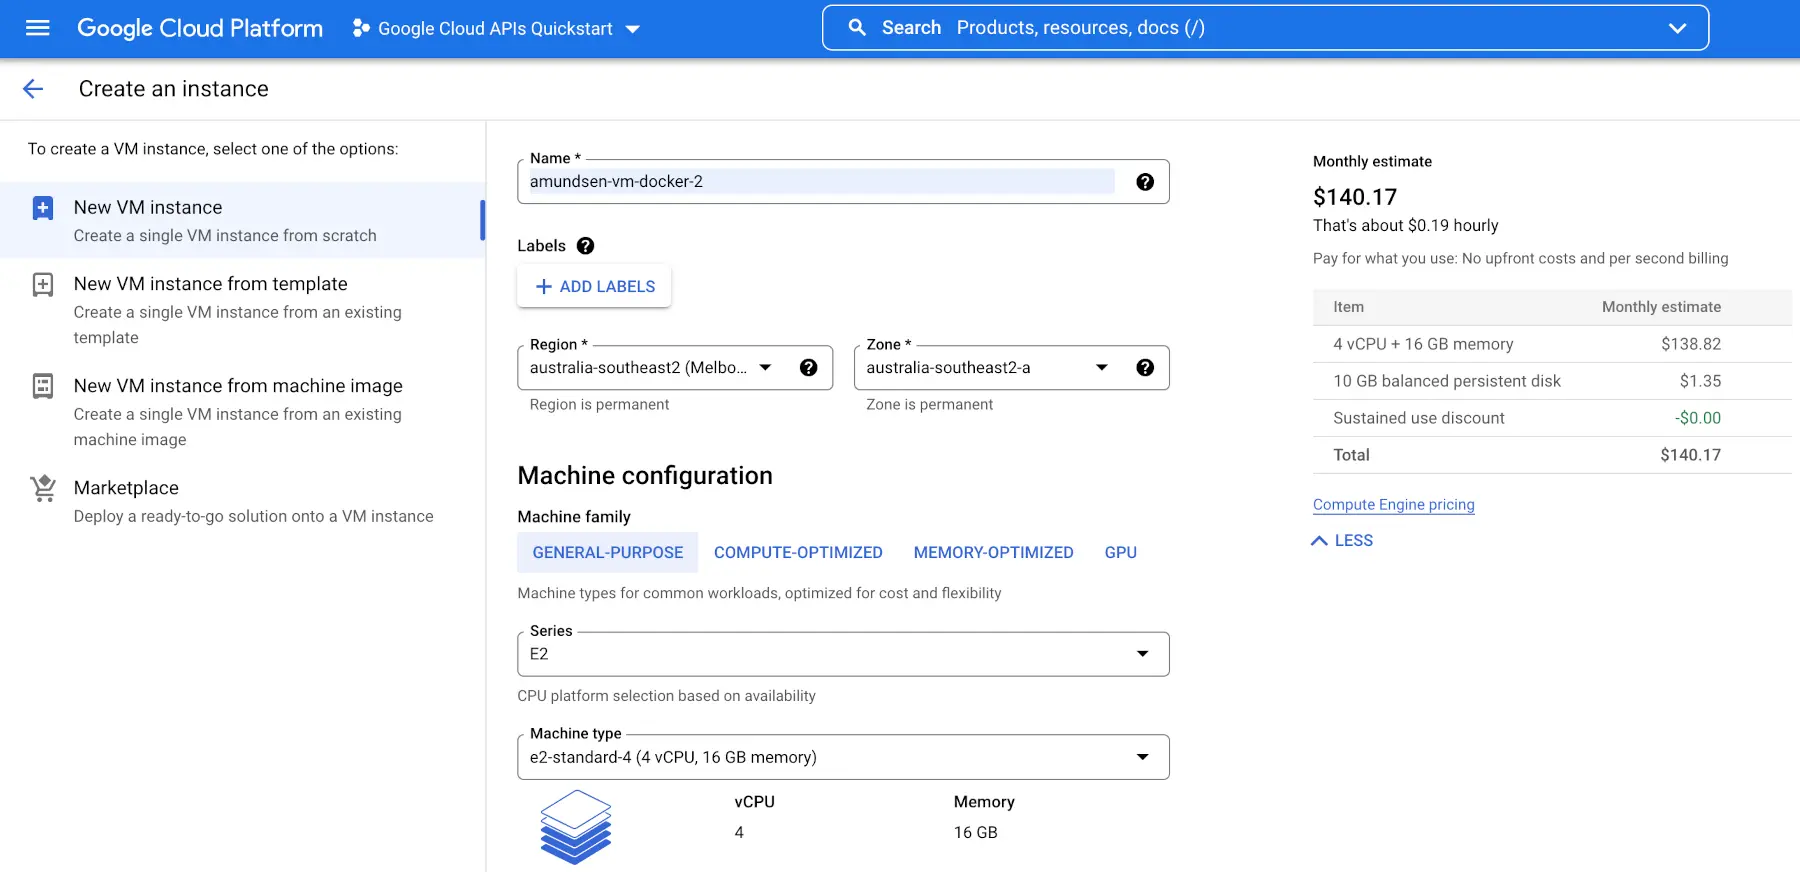
Launch a new GCP Cloud VM instance
Once you finish configuring your instance, you’ll be able to get the instance details by clicking on the named link from the list of instances, as shown in the image:
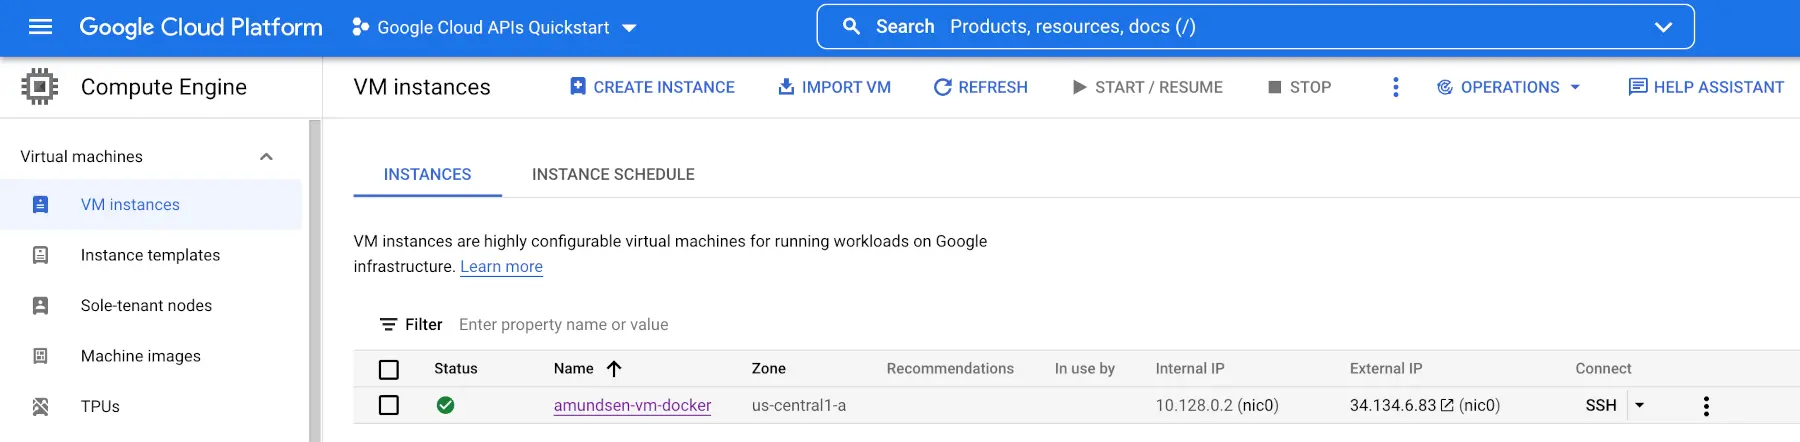
View GCP Cloud VM instance details
Going to the instance using the link will take you to the following page, with details like Instance Id, Zone, Machine type and so on.
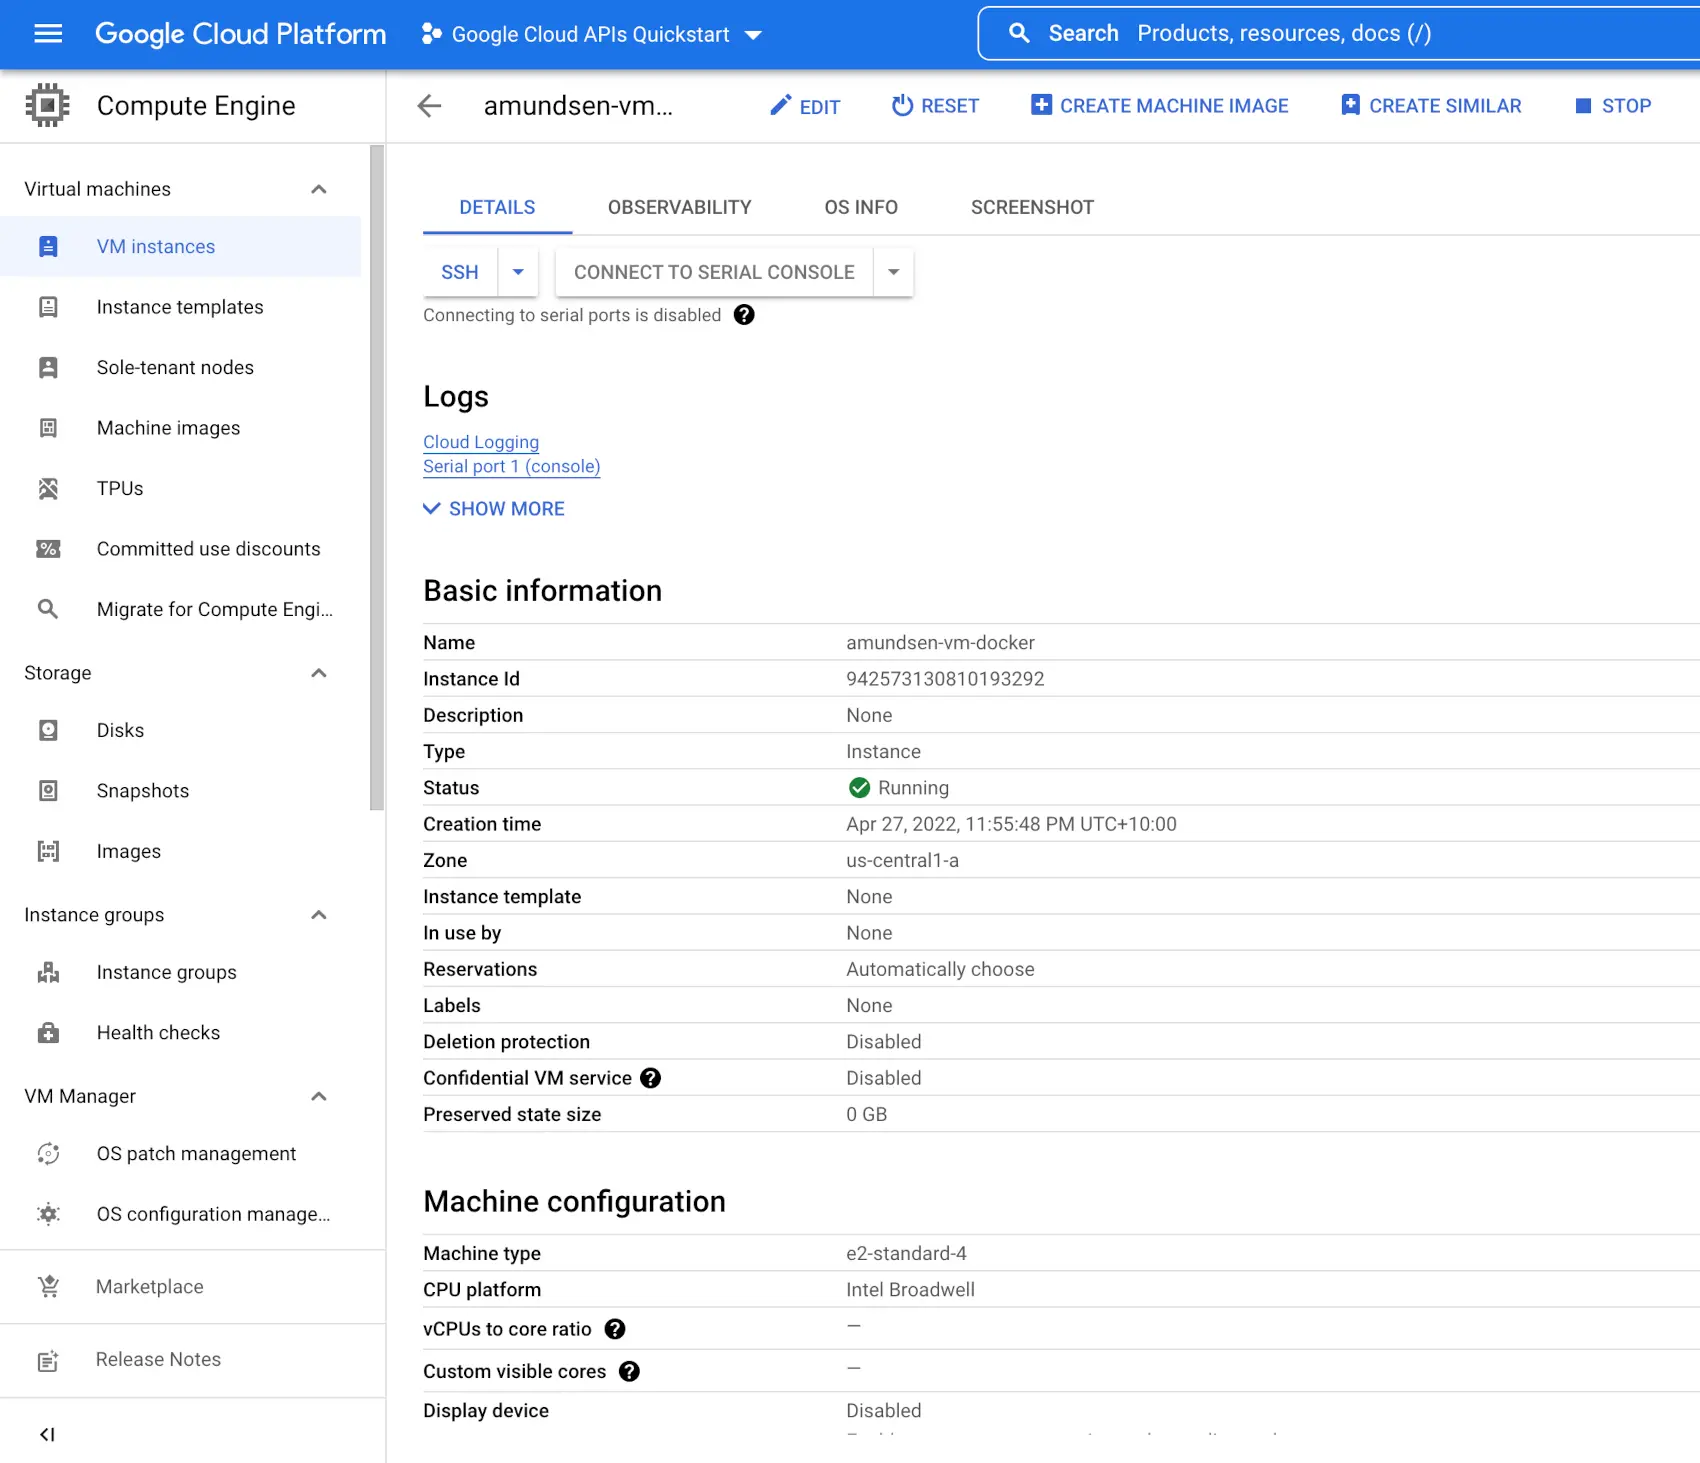
View information about the GCP Cloud VM instance
Step 2: Configure networking to enable public access to Amundsen
Set inbound & outbound traffic rules
As this project concentrates on getting you started with Amundsen, you can allow all ingress and egress traffic from the VPC associated with your VM. Allowing all traffic is usually not recommended for production. To enable all traffic, go to the VPC and use the Firewall option on the left panel to see the list of firewall rules. There might be a few rules already present. Remove all those rules and add the two rules shown in the image below to the firewall:
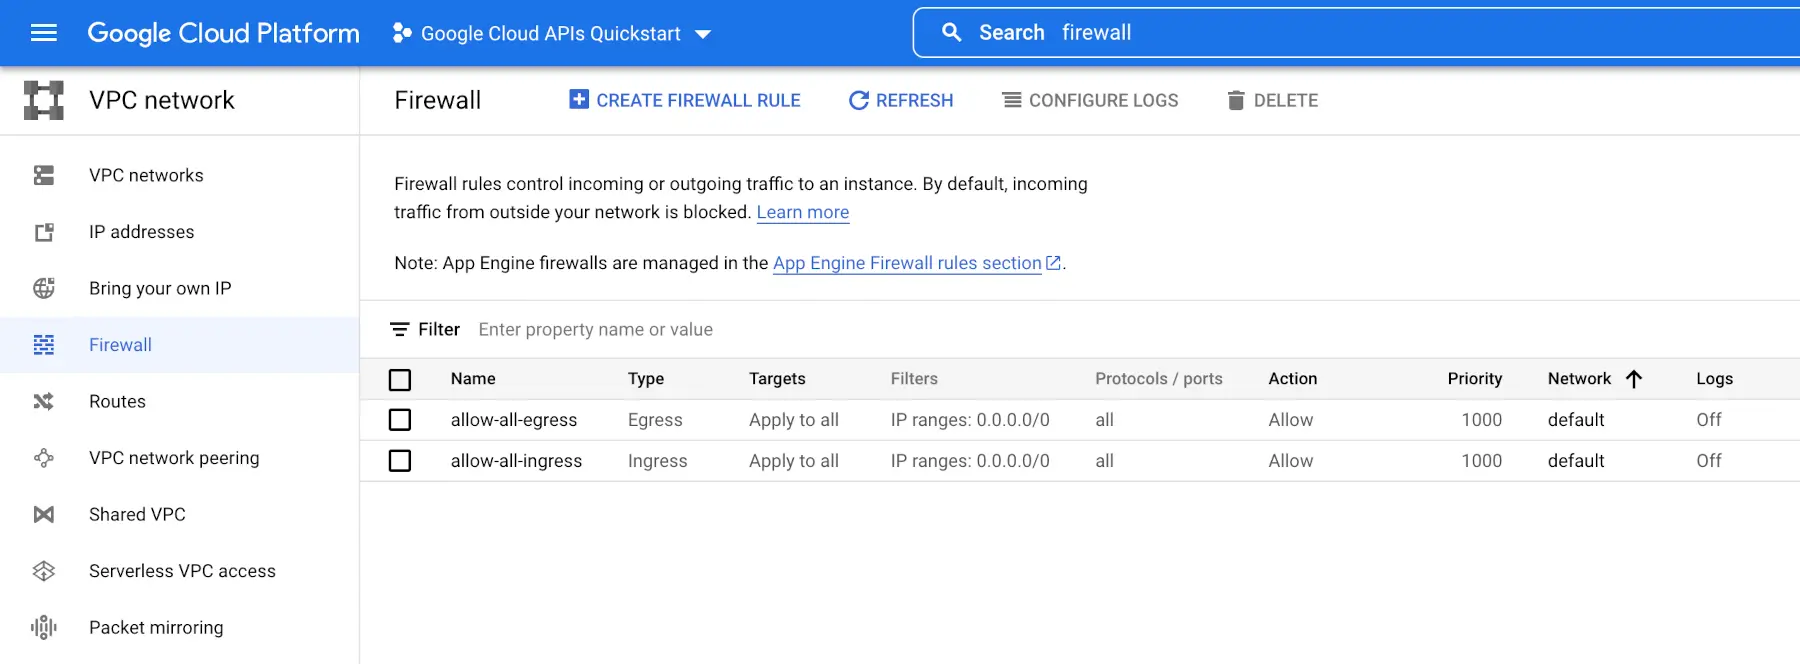
Set inbound & outbound traffic rules
Verify networking details
Use the kebab (three vertical dots) menu for your instance to navigate to the View network details option, as shown in the image below:
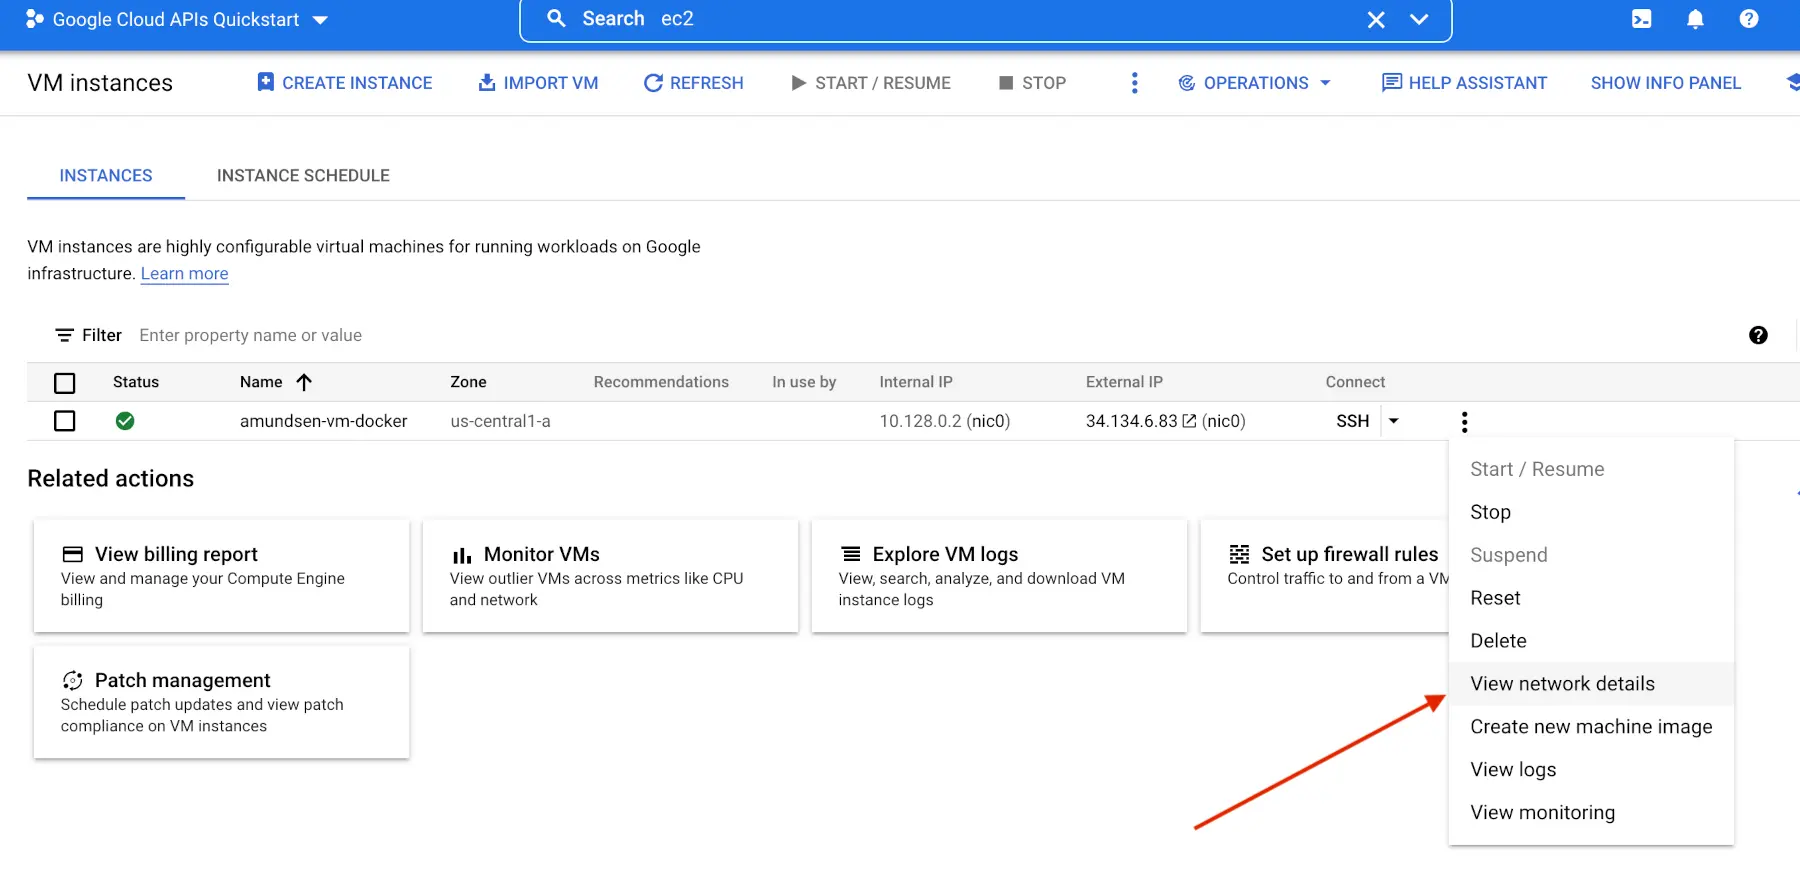
Verify networking details
Analyze the network using connectivity tests
As you’ve allowed all traffic on ports, reaching the VM from the internet will not be a problem. However, if you decide to limit incoming and outgoing traffic, you can navigate to the VPC network and create a connectivity test in the Network analysis section shown below:
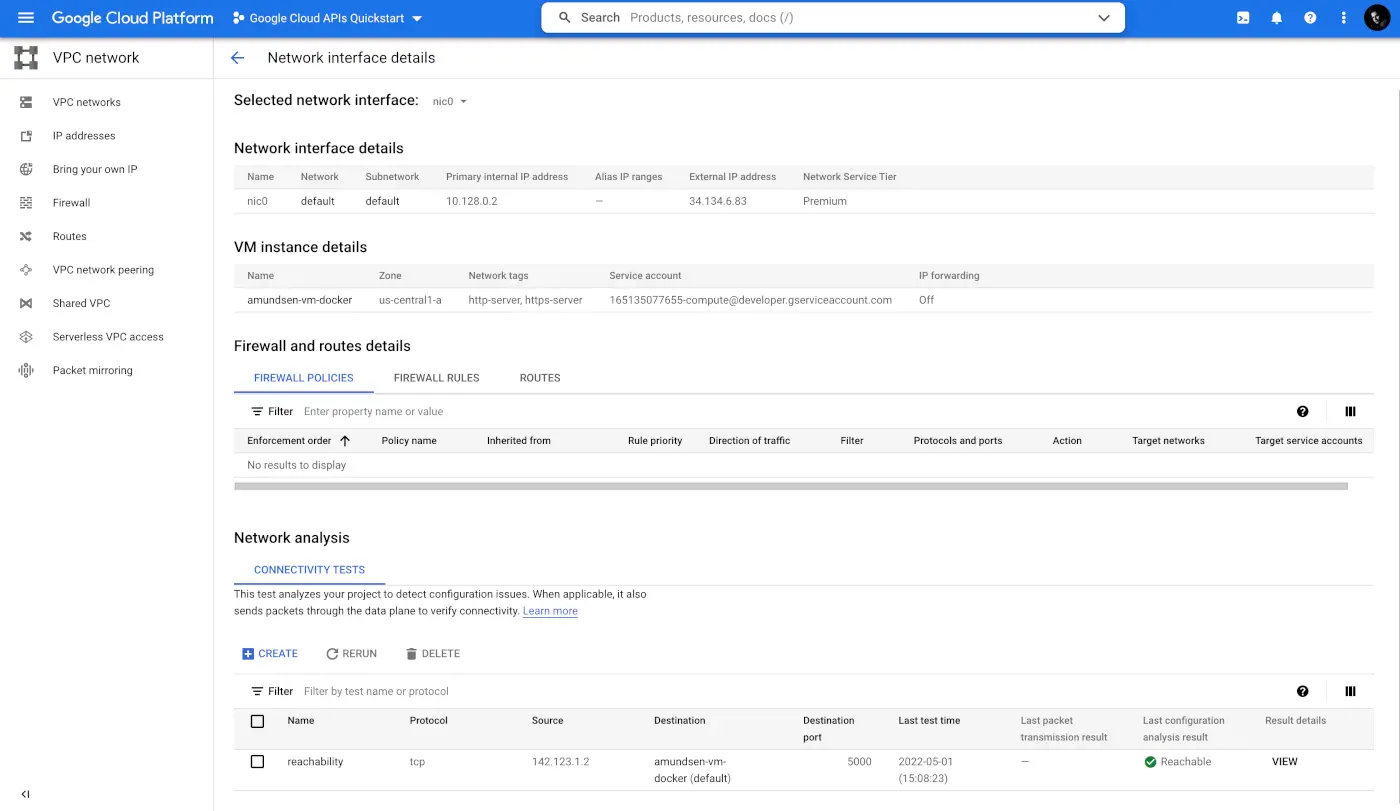
Create a connectivity test in the Network analysis
The source is a random public IP from the internet in the above example. You’ve tested whether requests from that IP can reach your VM on port 5000. You can view the result summary under the Last configuration analysis result column. You can also view details of the connectivity test by clicking on the VIEW link, as shown in the image below:
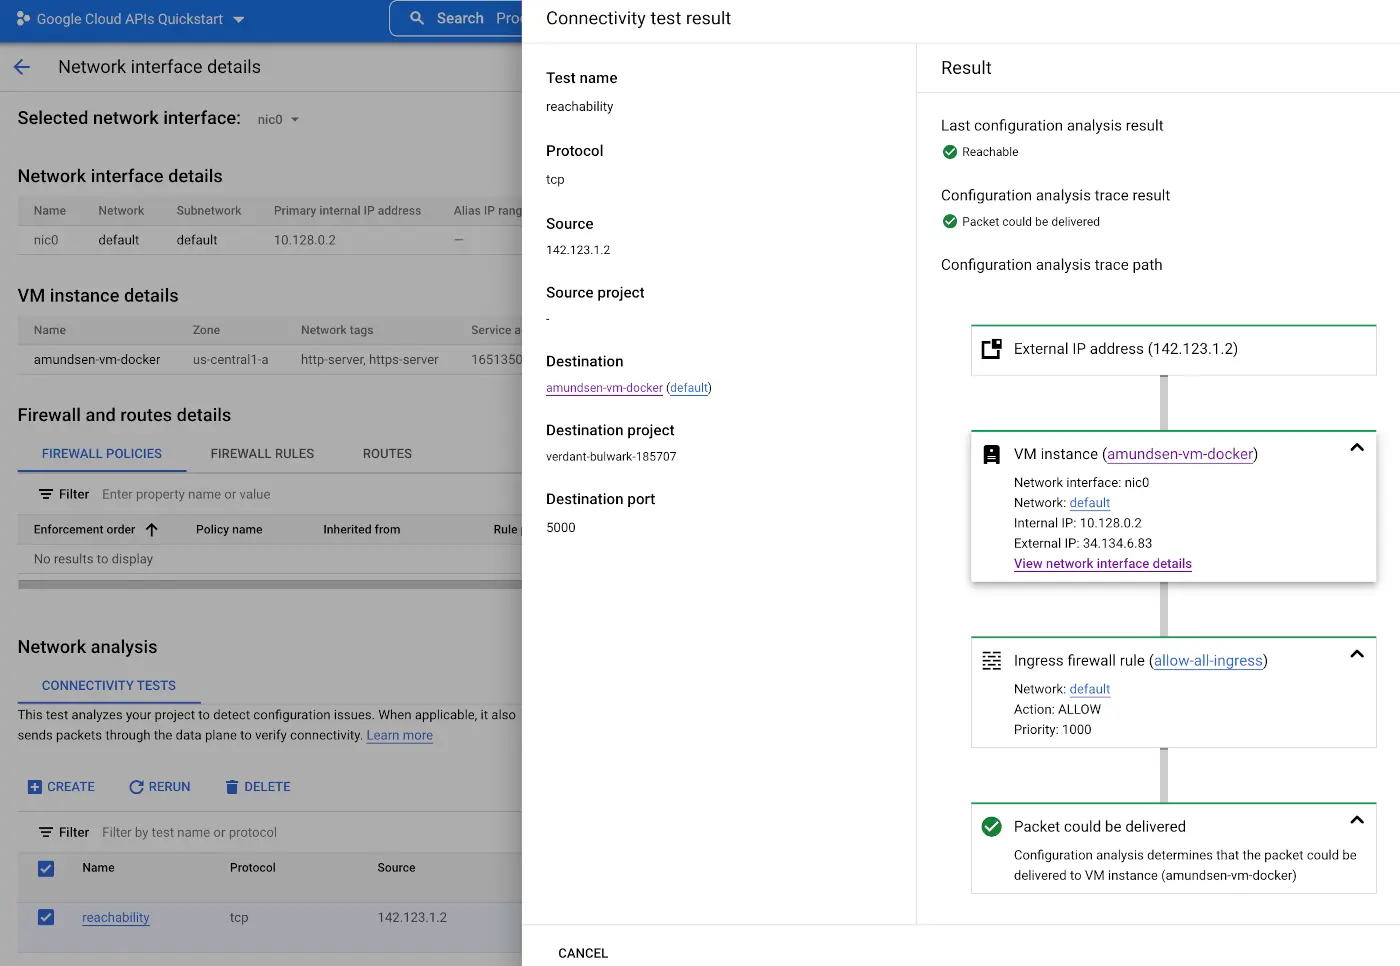
View connectivity test results
Step 3: Log in to Google Cloud VM and install Git
Connect to the Google Cloud VM
There are several ways in which you can interact with your VM. The simplest way is to use the cloud shell, as it doesn’t require setting any passwords or worrying about SSH keys. You can connect using SSH in your browser by pressing the SSH link or using one of the options in the dropdown shown in the image below:
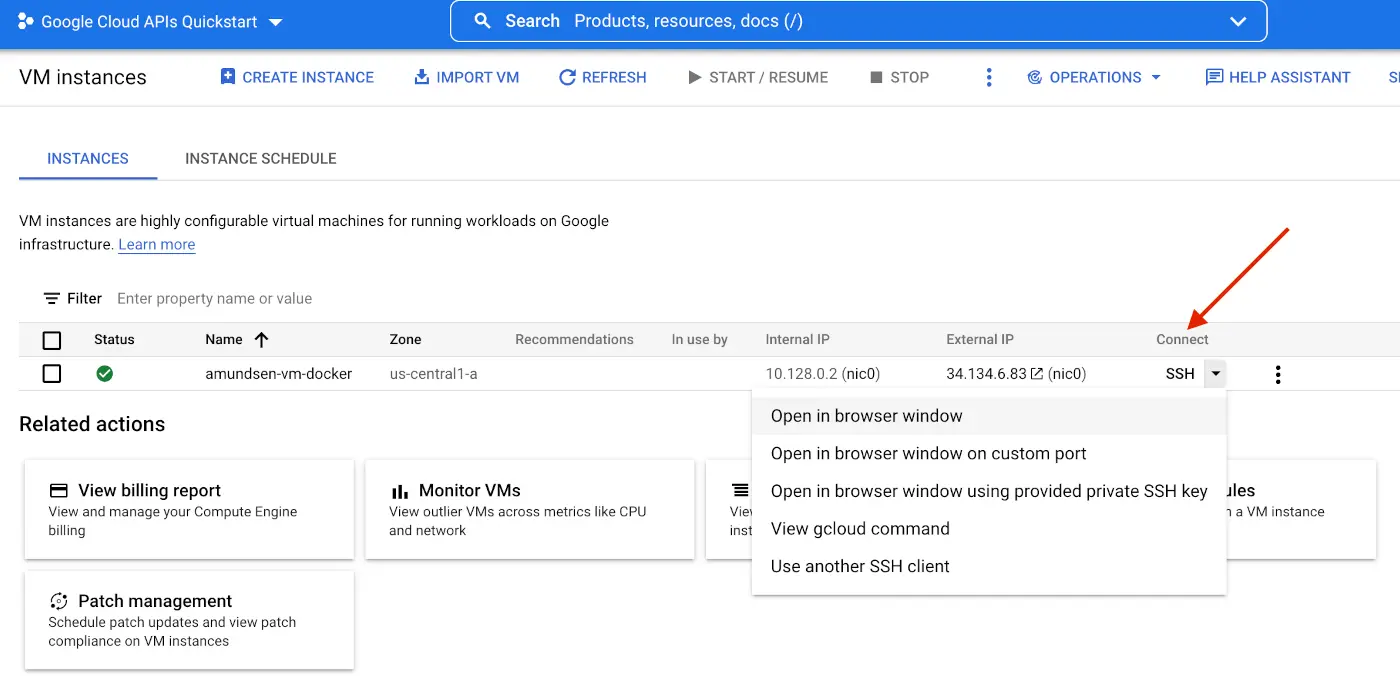
Connect to the GCP Cloud VM
Google Cloud creates and transfers temporary SSH keys to your VM, enabling your to access your VM:

Transfer SSH keys to VM
Once Google Cloud transfers your SSH keys to the VM, you will land at the following screen inside your VM:
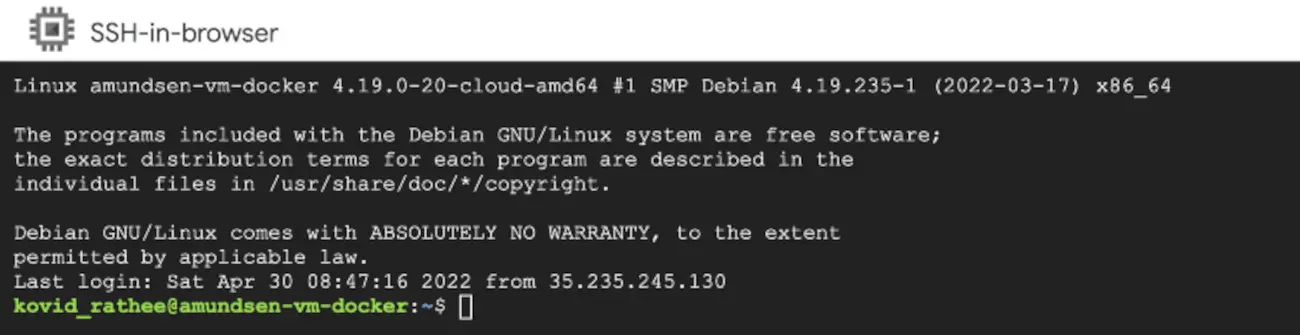
Accessing your GCP cloud VM using CLI
Install Git
As this is a completely fresh installation, it won’t have many standard tools that you might use. You will first need to install Git on your machine. Make sure that your Debian apt package manager is up to date using the following commands:
$ sudo apt update
$ sudo apt install git
Verify if Git has been installed correctly by checking the installed version of Git.
Step 4: Install Docker and Docker Compose on your GCP VM
Install Docker Engine
Installing Amundsen will first require you to install the Docker engine on your Google Cloud VM so that you can host and deploy Docker containers. As Amundsen is a multi-container application, Docker Compose will also be handy. First up, ensure that you update the apt-get package manager and install the relevant tools using the following commands:
$ sudo apt-get update
$ sudo apt-get install ca-certificates curl gnupg lsb-release
$ curl -fsSL https://download.docker.com/linux/ubuntu/gpg | sudo gpg --dearmor -o /usr/share/keyrings/docker-archive-keyring.gpg
Note that the third command is downloading the GPG key for the docker image. Using this GPG key, you can ensure that the image you’ll be using is a genuine Docker image using the command below:
$ echo "deb [arch=$(dpkg --print-architecture) signed-by=/usr/share/keyrings/docker-archive-keyring.gpg] https://download.docker.com/linux/ubuntu $(lsb_release -cs) stable" | sudo tee /etc/apt/sources.list.d/docker.list > /dev/null
Once you’re done with that, you can install the Docker engine along with the CLI using the commands below:
$ sudo apt-get update
$ sudo apt-get install docker-ce docker-ce-cli containerd.io docker-compose-plugin
$ docker --version
Install Docker Compose
$ sudo curl -Lhttps://github.com/docker/compose/releases/download/1.25.3/docker-compose-`uname -s`-`uname -m` -o /usr/local/bin/docker-compose
$ sudo chmod +x /usr/local/bin/docker-compose
$ docker-compose --version
Before starting work with Docker, ensure that your docker.sock has the correct permissions:
$ sudo chmod 666 /var/run/docker.sock
Enable & Start Docker Service
Use the following commands to enable and start the Docker engine and ContainerD services on your Debian VM:
$ sudo systemctl enable docker.service
$ sudo systemctl enable containerd.service
$ sudo systemctl start docker.service
$ sudo systemctl start containerd.service
You can also use the following commands to check the status of the services:
$ sudo systemctl status docker.service
$ sudo systemctl status containerd.service
If the installation goes alright, you’ll be able to see the following image with the status of the Docker service:
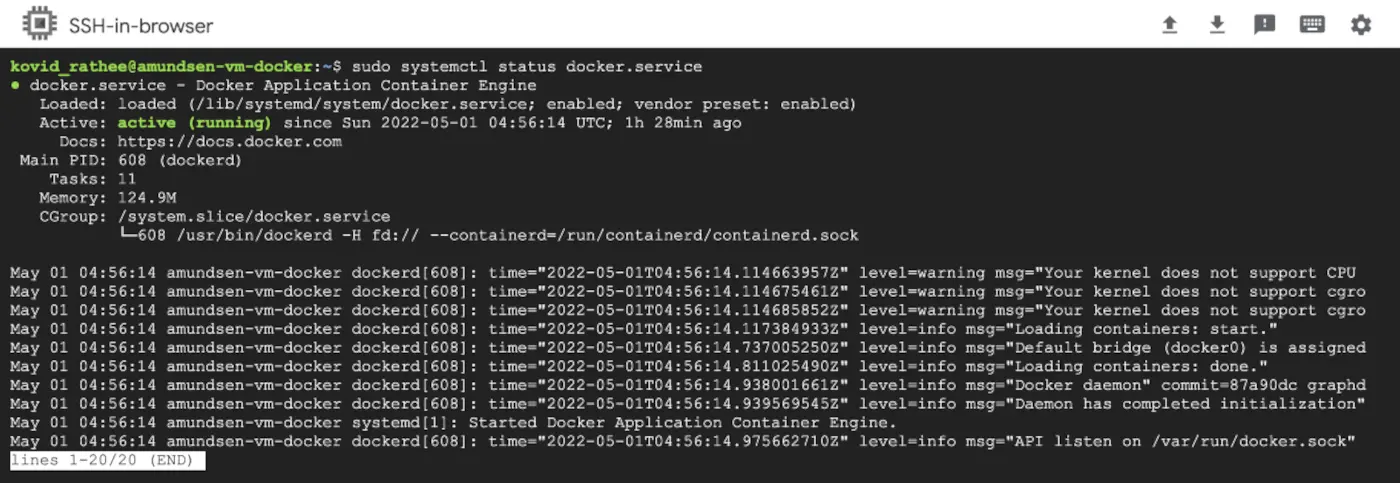
Status of the Docker service
Step 5: Clone the GitHub repository
Now, you need to clone the Amundsen GitHub repository on your GCP Cloud VM instance. You can use the following command to do that:
$ git clone --recursive https://github.com/amundsen-io/amundsen.git
The command mentioned above will checkout the main branch on your instance, which is what you want. Other branches are preserved in the archive, but nothing in them will ever be finished: the repository was frozen in September 2026, so no further work lands anywhere in it.
Step 6: Deploy Amundsen using Docker Compose on GCP
With Docker Engine and Docker Compose deployed and the GitHub repository checked out on your VM, you are ready to spin up Docker containers. You’ll see several YAML files in the repository’s root directory. These different files correspond to different types of installations and configurations. As mentioned at the beginning of this guide, you’ll be deploying Amundsen with the default database backend of neo4j; you’ll use the docker-amundsen.yml file to do that with the following command:
$ docker-compose -f docker-amundsen.yml up
You can also deploy Amundsen with the Apache Atlas backend using the docker-amundsen-atlas.yml file. After the deployment of all the services is complete, you’ll end up with an output like this:
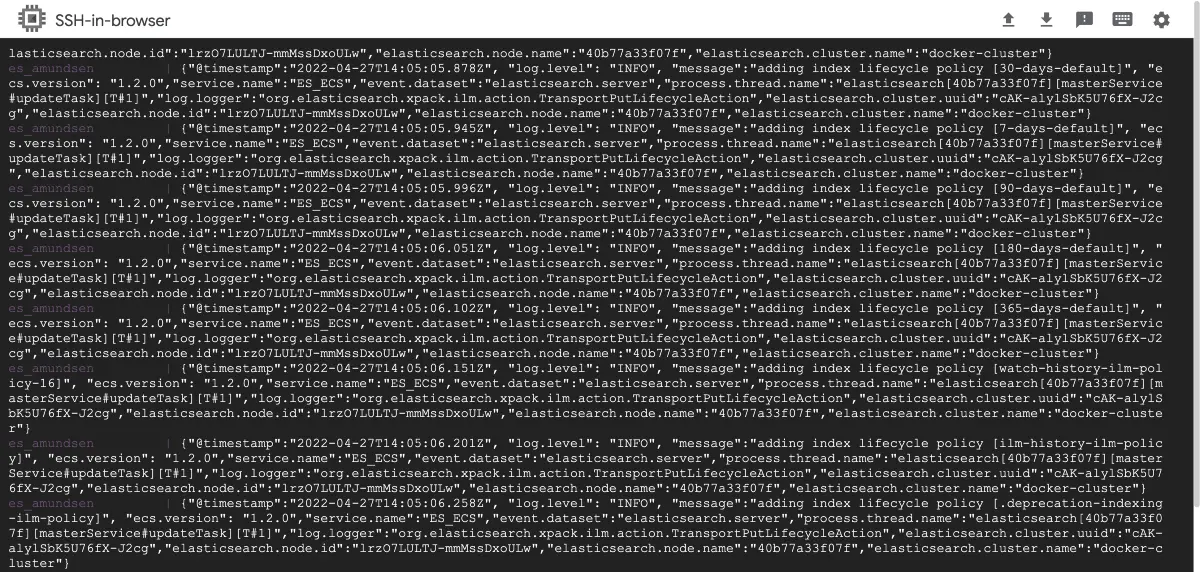
Status after deploying Amundsen on Docker on GCP
Step 7: Load sample data using Databuilder
To get started with Amundsen, you need to have some data loaded into it. The databuilder component of Amundsen helps you insert sample data into Amundsen. Databuilder also ensures that Amundsen’s Elasticsearch indexes are updated based on the newly inserted data. To explore the complete set of features of Amundsen, you’d probably need to have a decent amount of data. However, to get started, the sample data will be good enough. You can use the following commands to set up the python environment for the data loader:
$ cd amundsen/databuilder
$ python3 -m venv venv
$ source venv/bin/activate
$ pip3 install --upgrade pip
$ pip3 install -r requirements.txt
$ python3 setup.py install
Once the virtual environment setup is complete, you can invest the sample data using the following command:
$ python3 example/scripts/sample_data_loader.py
Working with Amundsen
Log onto Amundsen
Once the sample data has finished loading, you are ready to use Amundsen. You can use your VM’s public IP address or public DNS with port number 5000 to start using Amundsen. Note that Amundsen does not have a default authentication mechanism, and no upstream release will add one. You can integrate an OIDC-based identity provider yourself, and on an archived codebase that work, along with every later fix to it, sits with your team.
Use Amundsen Search
You’ll see the following screen first thing when you log onto Amundsen from your web browser:
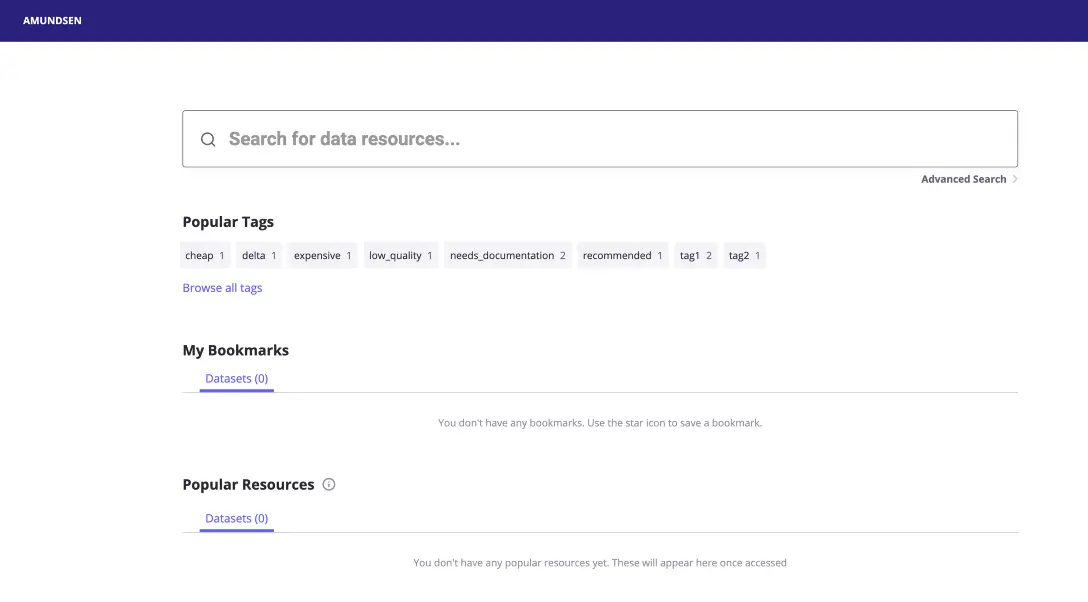
Amundsen Metadata Search
Elasticsearch powers the full-text search engine for Amundsen. Since you only uploaded sample data, most of the data include the test keyword, so you can start searching for the text, and Amundsen will show you all records that contain tests, either in the recording name or in the description. Once the data is loaded, you will see that some example tags are already present.
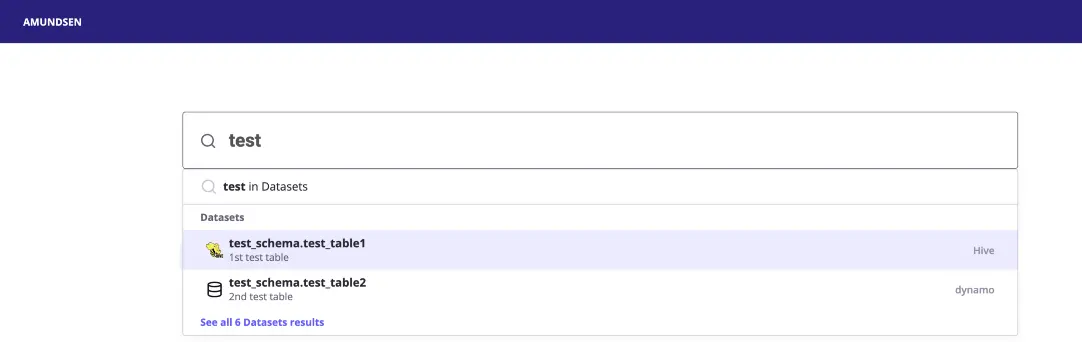
Metadata search and discovery on Amundsen
You can either navigate to one of the records displayed above or the list of all records that match your query. In this case, click the Show all 6 records and you will come to the following page:
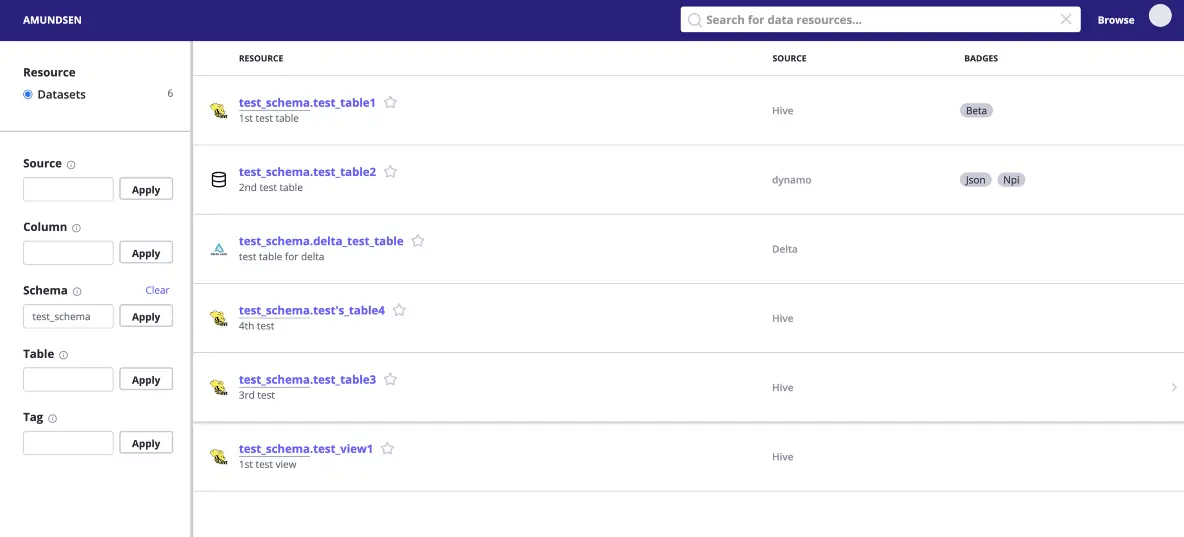
Metadata search results on Amundsen
If you have hundreds or thousands of datasets, you can use the filter options on this page to navigate to the desired dataset.
Navigate to a Dataset
After searching for a table or dataset, you can navigate to any of them to view the description, business context, structural metadata, ownership information, tags, etc., as shown in the image below:
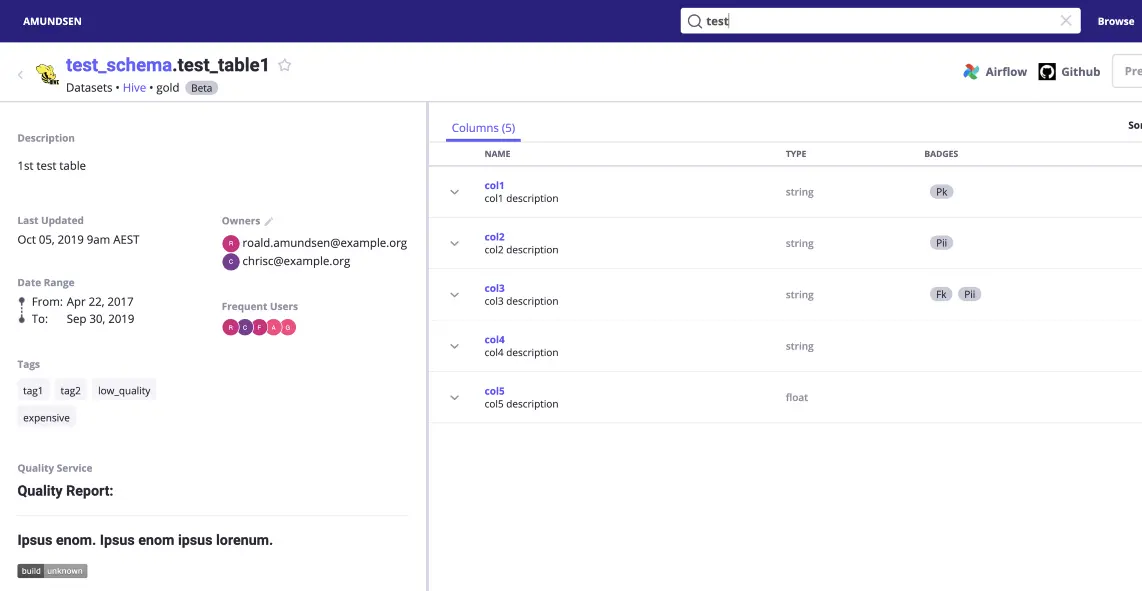
Navigate to a Dataset on Amundsen
There are many other things to try out in Amundsen. You can integrate any data source and set up metadata retrieval for them. You can also narrow your search results by adding better descriptions and relevant tags and making the right people the owners of their respective records. This will enable you to get the most out of Amundsen.
More Ways of Deploying Amundsen on GCP
A basic Amundsen installation on a GCP VM is a starting point, not a production setup. Teams that ran Amundsen in production on Google Cloud generally used GKE (Google Kubernetes Engine) with the Helm charts in the project repository, and the installation docs list the variations. Those charts and docs stopped changing when the project was archived, so the image tags and Kubernetes API versions they reference are frozen at September 2026. Expect to update them yourself against a current cluster.
Conclusion
This step-by-step guide took you through the process of installing Amundsen on GCP using Docker. Run it if you already have Amundsen and need another environment, a rebuild, or somewhere to reproduce a problem, and budget for the security and authentication work the installation does not do for you. It is not the way to start a new catalog. With the repository read-only since September 2026, every patch from here is yours to write, which is why teams choosing today go to DataHub or OpenMetadata.
If you are a data consumer or producer and are looking to champion your organization to optimally utilize the value of your modern data stack — while weighing your build vs buy options — it’s worth taking a look at off-the-shelf alternatives like Atlan — A data catalog and metadata management tool built for the modern data teams.
